AutoUpdate Tool
InstallBuilder bundles an automatic update tool that can be used to download and install packages over the Internet, AutoUpdate. It can be found in the autoupdate/ directory under the main installation directory.
How to Use AutoUpdate in InstallBuilder
The AutoUpdate tool allows you to provide your users with an easy and automatable way to check for, download and apply updates to your software.
How Does it Work?
When executed, the AutoUpdate wizard will poll your server to get information about the available software versions for the platform in which it is running. The detailed process is:
-
Read the INI file that contains information about where to contact the server and which version is currently installed. This INI file must be delivered together with the binary and placed in the same directory.
-
Get the XML file from the server, which contains available versions for each platform.
-
If there’s a newer version available for the target platform (checking that the version ID received is higher than the current one stored in INI file), download and install it or notify the user depending on the execution mode.
The AutoUpdate wizard is defined in an XML project, similar to a regular InstallBuilder project, but much simpler. The project XML file must have the main tag <autoUpdateProject> containing the list of customizations to apply to the wizard:
<autoUpdateProject>
  <fullName>Example Project</fullName>
  <shortName>example</shortName>
  <vendor>Acme Inc.</vendor>
  <version>1.0</version>
  <windowsExecutableIcon>images/updater.ico</windowsExecutableIcon>
  <leftImage>images/left-image.png</leftImage>
  <logoImage>images/logo-image.png</logoImage>
  ...
</autoUpdateProject>
The currently supported settings are:
-
General settings:
-
<fullName>: The full product name, as it will be displayed in the autoupdater -
<shortName>: The short version of product name. It can only contain alphanumeric characters -
<vendor>: Vendor name -
<version>: Product version number. -
<rebootRequired>: Determines whether or not to ask the user to reboot after the AutoUpdate process is completed (Windows-specific option). -
<requireInstallationByRootUser>: Whether or not running the autoupdater will require super user privileges (root on Linux, Administrator user on Windows and OS X). This setting will prevent the autoupdate from running if the user is not root or Administrator on all operating systems except for OS X. In OS X, the regular authentication dialog window will be shown, asking the user for the administrator password so the autoupdate wizard can be run with root privileges -
<singleInstanceCheck>: Check that only one autoupdater instance is running -
<requestedExecutionLevel>: UAC execution level of the AutoUpdate on Windows
-
-
Look And Feel:
-
<height>: Autoupdate wizard window height -
<width>: Autoupdate wizard window width -
<leftImage>: 163x314 GIF or PNG image that will be placed at the left side of the autoupdate wizard in the Welcome and Update Finished pages. If no image is specified, the default image will be used -
<logoImage>: 48x48 GIF or PNG logo image that will be placed at the top right corner of the autoupdate wizard. If no image is specified, the default image will be used -
<splashImage>: The GIF or PNG image that will appear when launching the autoupdate wizard. -
<splashScreenDelay>: Extra display time of the splash screen in milliseconds -
<disableSplashScreen>: Disable the initial splash screen. -
<overrideGtkButtonText>: Translate buttons to the selected language instead of using system-built values for Unix GTK mode -
<wmImage>: 48x48 GIF or PNG logo image that will be shown in the window manager task bar on Unix systems. If no image is specified, the default logo image will be used -
<windowsExecutableIcon>: ICO file with an specific format to set the icon for the autoupdate executable file on Windows systems. The allowed ICO formats are detailed in the Windows Icons section. -
<osxApplicationBundleIcon>: ICNS file to include in the AutoUpdate Application Bundle
-
-
Windows Resources:
-
<windowsResourceComments>: Comments for resources embedded in Windows executable -
<windowsResourceCompanyName>: Company Name for resources embedded in Windows executable -
<windowsResourceFileDescription>: File Description for resources embedded in Windows executable -
<windowsResourceFileVersion>: File version for resources embedded in Windows executable -
<windowsResourceInternalName>: Internal Name for resources embedded in Windows executable -
<windowsResourceLegalCopyright>: Legal Copyright for resources embedded in Windows executable -
<windowsResourceLegalTrademarks>: Legal Trademarks for resources embedded in Windows executable -
<windowsResourceOriginalFilename>: Original Filename for resources embedded in Windows executable -
<windowsResourceProductName>: Product Name for resources embedded in Windows executable -
<windowsResourceProductVersion>: Product Version for resources embedded in Windows executable
-
Once your <autoUpdateProject> is configured, you can build it using the customize tool, located in the bin folder, under the AutoUpdate directory. Depending on the OS, you will be able to build AutoUpdate binaries for windows, osx, linux or linux-x64, reusing the same AutoUpdate XML project.
The syntax to use the tool is:
$> installbuilder-23.1.0/autoupdate/bin/customize build /path/to/autoUpdateProject.xml windows

 Autoupdater successfully created. You can find it at

 installbuilder-23.1.0/autoupdate/output/autoupdate-windows.exe
You can also check it invoking the tool without arguments:
$> installbuilder-23.1.0/autoupdate/bin/customize

Wrong syntax. Correct syntax is

customize build /path/to/project.xml [windows|linux|linux-x64|osx]
As previously mentioned, the AutoUpdate wizard must be distributed along with an INI file. The basic information required, organized in the Update section of the INI file, is:
-
url: Points to the remote location of the update data. -
version_id: The local version identifier, which is compared to the remote version identifier to trigger the update process. Its value must be a positive integer. -
update_download_location: The path to the folder where the downloaded files will be saved. Downloading a file that already exists in the download location path will result in the new file being renamed in an incremental way, by appending a number at the end of the file name. If the download folder does not exist, the automatic update process will attempt to create it. If not specified, it defaults to~/.installbuilder/updates. -
check_for_updates: It is possible to enable and disable the AutoUpdate on demand by setting this boolean value.
update.ini file[Update]
url = http://example.com:8080/update.xml
version_id = 0100
check_for_updates = 1
update_download_location = ${installer_directory}/tmp
Apart from these basic keys, it is also possible to configure other AutoUpdate settings such as the proxy configuration (Proxy section):
-
enable: Enables (1) or disables (0) the proxy. If the rest of keys are not provided, the proxy configuration from the system will be autodetected and used (if any). -
server: The proxy server. -
port: The port in the proxy server. -
username: Username in the proxy server (if required) -
password: The password in the proxy server (if required)
update.ini file with proxy configuration[Update]
url = http://example.com:8080/update.xml
version_id = 0100
check_for_updates = 1
update_download_location = ${installer_directory}/tmp
[Proxy]
server=proxy.example.com
port=8080
username=foo
password=bar
Some of these settings can also be passed to the AutoUpdate through the command line when calling it. The provided values will then overwrite those configured in the INI file. You can check the available command line settings using the --help flag:
$> installbuilder-23.1.0/autoupdate/runtimes/autoupdate-linux.run --help
Your Program 1.0
Usage:

 --help                         Display the list of valid options

 --unattendedmodeui <unattendedmodeui> Unattended Mode UI
                                Default: none
                                Allowed: none minimal minimalWithDialogs

 --debuglevel <debuglevel>      Debug information level of verbosity
                                Default: 2
                                Allowed: 0 1 2 3 4

 --settings_file <settings_file> Path to the local settings file, containing the HTTP URL to update and the current version ID.
                                Default: installbuilder-23.1.0/autoupdate/runtimes/update.ini

 --url <url>                    HTTP URL that points to the xml file containing the update data.
                                Default:

 --version_id <version_id>      Version ID of the local installation.
                                Default:

 --update_download_location <update_download_location> Path where the downloaded files will be stored.
                                Default: ~/.installbuilder/updates

 --check_for_updates <check_for_updates> Boolean value to specify whether to check for updates or not.
                                Default: 1
Apart from the INI file, you also must define an XML file (update.xml) with the available versions and make it available on your server, in the URL defined in the update.ini file. The server XML must define the below set of properties:
-
<version>: Specifies the version of the update. This is the version that will be displayed to the end user. It is not taken into account by the update wizard when determining whether or not there is an update available. Instead,<versionId>is used for that. -
<versionId>: This is an integer, whose value is compared with the one located in the local update.ini file. If the value of<versionId>is bigger than the local one, it indicates that there is a new version of the software available. -
<platformFileList>: This section describes the available update installers for each platform. Each update binary is defined as a<platformFile>, in which you specify the<filename>that will be downloaded only if the user’s operating system matches the one defined as<platform>. At the moment, OS X installers are expected to be compressed in a .tgz file but future versions will allow users to use other formats. -
<downloadLocationList>: List of download locations (<downloadLocation>), each containing a URL pointing to the remote folder where the files are located, which is used to generate the list of mirrors selectable in the AutoUpdate user interface. The HTTP URL containing the update will be constructed by appending the file field to the mirror url. In the example below, it means the Linux version will be available from http://www.example.com/updates/download/program-4.0.1.run and ftp://www.example.com/mirror/updates/download/program-4.0.1.run
  <installerInformation>
    <versionId>2000</versionId>
    <version>4.0.1</version>
    <platformFileList>
        <platformFile>
            <filename>program-4.0.1.exe</filename>
            <platform>windows</platform>
        </platformFile>
        <platformFile>
            <filename>program-4.0.1.run</filename>
            <platform>linux</platform>
        </platformFile>
    </platformFileList>
    <downloadLocationList>
        <downloadLocation>
            <url>http://www.example.com/updates/download/</url>
        </downloadLocation>
        <downloadLocation>
            <url>ftp://www.example.com/mirror/updates/download/</url>
        </downloadLocation>
    </downloadLocationList>
</installerInformation>|
Note
|
|
Basic example
Imagine you have an application called My Application and you want to include the AutoUpdate functionality in version 1.0.0. You may also want, for example, for the update process to be run by an Administrator and prevent multiple instances of the AutoUpdate to run simultaneously. This wizard installer could be created with the simple code below:
  <autoUpdateProject>
     <fullName>My Application</fullName>
     <shortName>myapp</shortName>
     <vendor>Acme Inc.</vendor>
     <version>1.0.0</version>
     <singleInstanceCheck>1</singleInstanceCheck>
     <requireInstallationByRootUser>1</requireInstallationByRootUser>
  </autoUpdateProject>
You may also want to change the images and icons to have application-specific ones. To do so, you can add the options: <leftImage>, <logoImage>, <splashImage>, <wmImage>. Once all desired options are included in autoUpdateProject.xml file, you can build the AutoUpdate wizard using the customize command:
 installbuilder-23.1.0/autoupdate/bin/customize.run build autoUpdateProject.xml linux
 installbuilder-23.1.0/autoupdate/bin/customize.run build autoUpdateProject.xml windows
 installbuilder-23.1.0/autoupdate/bin/customize.run build autoUpdateProject.xml osx
After that, binary files for Linux, OS X and Windows should be found in the AutoUpdate output directory.
Apart from the AutoUpdate binary, you will need to setup a server with the new installers and update.xml file. This example assumes the server is running locally in port 8080. (you can easily setup a web server using LAMPStack (Linux), WAMPStack (Windows) or MAMPStack (OS X) from BitNami.org). Just copy the latest installers and an update.xml file describing that version, the filenames and mirrors to the server:
    <installerInformation>
       <versionId>200</versionId>
       <version>2.0.0</version>
       <platformFileList>
	   <platformFile>
	       <filename>myapplication-installer-2.0.0.exe</filename>
	       <platform>windows</platform>
	   </platformFile>
	   <platformFile>
	       <filename>myapplication-installer-2.0.0.run</filename>
	       <platform>linux</platform>
	   </platformFile>

	   <platformFile>
	       <filename>myapplication-installer-2.0.0.app.tgz</filename>
	       <platform>osx</platform>
	   </platformFile>
       </platformFileList>
       <downloadLocationList>
	   <downloadLocation>
	       <url>http://127.0.0.1:8080/downloads/</url>
	   </downloadLocation>
       </downloadLocationList>
    </installerInformation>
where <versionId> has been set to a higher integer value than previous ones and a single mirror has been configured. You can include any number of mirrors by adding multiple <downloadLocation> elements though. In the example, the installers will be available from:
-
http://127.0.0.1:8080/downloads/myapplication-installer-2.0.0.run -
http://127.0.0.1:8080/downloads/myapplication-installer-2.0.0.exe -
http://127.0.0.1:8080/downloads/myapplication-installer-2.0.0.app.tgz
To provide AutoUpdate with the needed information to find the XML file in the server and to check the information on it, you must write an update.ini file:
[Update]
url = http://127.0.0.1:8080/update.xml
version_id = 100
check_for_updates = 1
update_download_location = /tmp
In this case, update.xml will be obtained from localhost, saving temporary installers inside the /tmp path. The application upgrade process will be done if the received <versionId> is greater than 100.
Once you have placed your binary files and update.xml on your server and the update.ini file is in the same directory as the AutoUpdate binary, it is ready to go. You can launch it by double-clicking on it or from a command line prompt:
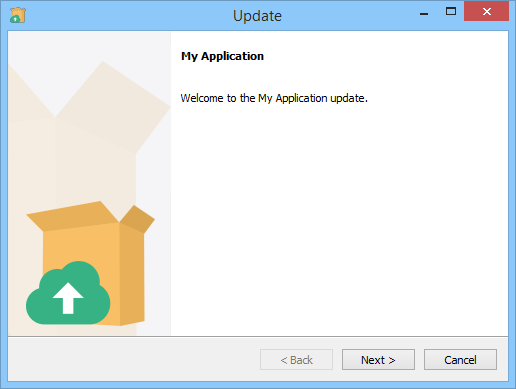
$> autoupdater-linux.runWhen it is started, according to the settings you configured in the XML project, if the user running the updater is not an Administrator, he will be notified and the AutoUpdate process will end. If there is another instance already running, a notification will let the user know and he or she will be able to indicate whether or not the process should continue. If both requirements are met, a welcome screen will appear:
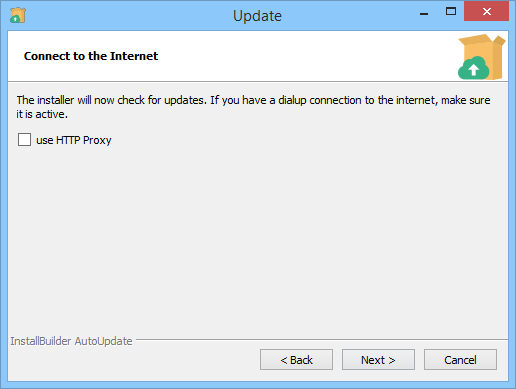
After clicking Next, you will get a screen to configure a proxy if it is necessary.
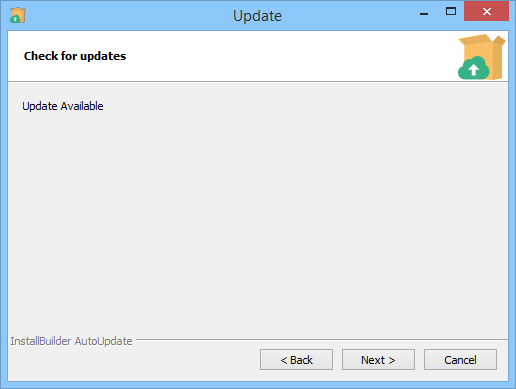
It will contact the server and check if there are new versions available. If there is an update, the following screen will be shown:
If you click Next, a new window with the list of mirrors will be displayed:
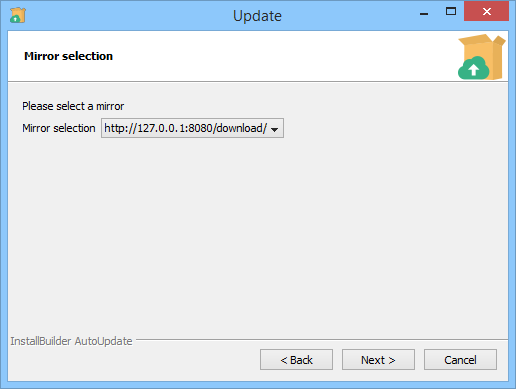
If you just provided a single download location for the binaries, the mirrors page will be skipped.
After the details of the connection have been configured, the download process starts:
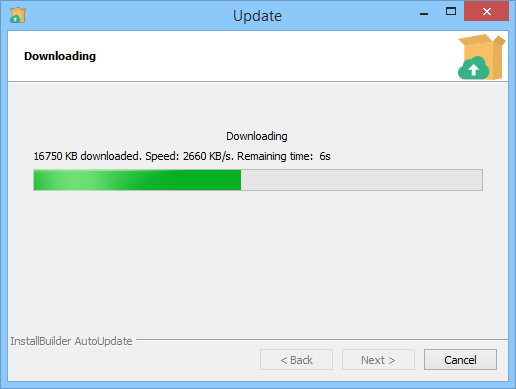
Once the download finishes, the update installer is automatically started.
Adding the AutoUpdate to an Existing InstallBuilder project
The only steps required to include the new feature as part of the application installation is to copy the appropriate AutoUpdate wizard file for each operating system and place the configured update.ini file in the same folder. For instance, you can define a component in the following way:
<component>
   <name>autoupdater</name>
   <description>includes tool to perform updates</description>
   <canBeEdited>0</canBeEdited>
   <selected>1</selected>
   <show>0</show>
   <folderList>
       <folder>
           <name>autoupdaterwin</name>
           <destination>${installdir}</destination>
           <platforms>windows</platforms>
           <distributionFileList>
               <distributionFile origin="autoupdater-windows.exe"/>
           </distributionFileList>
       </folder>
       <folder>
           <name>autoupdaterlinux</name>
           <destination>${installdir}</destination>
           <platforms>linux</platforms>
           <distributionFileList>
               <distributionFile origin="autoupdater-linux.run"/>
           </distributionFileList>
       </folder>
   </folderList>
   <postInstallationActionList>
       <writeFile>
           <path>${installdir}/update.ini</path>
           <text>[Update]
url = ${update_xml_url}
version_id = ${application_version_id}
update_download_location = ${system_temp_directory}
check_for_updates = 1
</text>
       </writeFile>
   </postInstallationActionList>
</component>
Where the update_xml_url installer variable must be setup to the point where update.xml can be fetched and application_version_id must be modified to a higher value on each installer update. This component will automatically take the AutoUpdate binaries from the project directory and deploy the appropriate one on the target machine.
Using AutoUpdate as a notifier
Another interesting feature you could add to your installations is using the AutoUpdate as a notifier which will silently check for updates. This can be achieved by calling the tool in unattended mode:
$ autoupdater.run --mode unattendedThe exit code will be 0 if an update is available and >0 if not. Once a new version is detected, you could then show a popup to your users with a There's a new update available message. To do so, you just call the process in background and generate the message if the returned code is 0:
if (system("path/to/autoupdater --mode unattended") == 0){
 printf("Update available. Run autoupdate to apply it.");
}
Something similar may be added when the application starts, or as a cron task if it is a web application, so that the user detects that there’s a new update without having to run AutoUpdate manually to check it.
How to execute custom actions right after the AutoUpdate has started
In some cases, it is necessary to make a first validation of the system to start the autoupdate process. This can be achieved using the <autoUpdateInitializationActionList> element, that is used to perform action once the update installer has started.
<autoUpdateInitializationActionList>
  <throwError>
    <text>Another instance is running. This instance will abort</text>
    <ruleList>
      <singleInstanceCheck logic="is_running" />
    </ruleList>
  </throwError>
</autoUpdateInitializationActionList>
How to execute custom actions after the update installer is downloaded
The default behavior of AutoUpdate is to launch the downloaded installer but sometimes it is necessary to perform some validation over the downloaded files, for example to check the integrity of the downloaded data. These kind of custom actions can be defined using the <postUpdateDownloadActionList>:
<postUpdateDownloadActionList>
<!-- Execute some validations here -->
...
<!-- The path to the downloaded update will be stored in
the ${downloadedFilePath} built-in variable. We calculate the MD5 -->
<runProgram>
<program>md5sum</program>
<programArguments>${downloadedFilePath}</programArguments>
</runProgram>
<!-- You can use any action like using httpGet to retrieve a valid
value for the md5sum or directly send the md5 to the server to validate it it -->
<throwError>
<text>It seems the downloaded installer was corrupted</text>
<ruleList>
<compareText>
<text>${program_stdout}</text>
<logic>does_not_equal</logic>
<value>${someExpectedValue}</value>
</compareText>
</ruleList>
</throwError>
...
<!-- Launch the installer -->
<runProgram>
<program>${downloadedFilePath}</program>
<programArguments>--prefix /tmp/someDir --enable_component_a 1 --is_update 1 &</programArguments>
</runProgram>
</postUpdateDownloadActionList>Please note the usage of the built-in ${downloadedFilePath} variable to get the path of the update installer. This is necessary because although you define the update_download_location key in the update.ini file, if an older file with the same name is found there, a suffix will automatically be appended to the file name: sample-1.0-windows-installer.exe.1, sample-1.0-windows-installer.exe.2 …
In addition, you will have to manually launch the downloaded file because the default behavior was overridden.
This is especially useful to launch the updates in unattended mode or to pass some command line argument as in the example.
AutoUpdate installers in unattended mode
The AutoUpdate installer can be executed in unattended mode just as with regular InstallBuilder installers:
autoupdate-linux.run --mode unattendedAs mentioned in the previous section, when launched in unattended mode, AutoUpdate will simply check if an update is available and then will finish its execution. However, this behavior is configurable.
Regular unattended mode
autoupdate-linux.run --mode unattendedIn this mode, AutoUpdate is executed as a checker. It will return a 0 exit code if it finds a new update and a positive integer otherwise. The snippet below shows how to use it from an InstallBuilder installer which bundled AutoUpdate:
    <project>
	...
	<initializationActionList>
	   <showQuestion default="yes" text="Would you like to check for updates?" variable="shouldCheckForUpdates" />
	   <actionGroup>
	      <actionList>
		 <!-- Once you have unpacked the bundled autoupdate and update.ini to some folder, like /tmp/autoupdate -->
		 <runProgram>
		    <program>/tmp/autoupdate/autoupdate-linux.run</program>
		    <programArguments>--mode unattended</programArguments>
		 </runProgram>
		 <showInfo text="An update is available!">
		   <ruleList>
		       <isFalse value="${program_exit_code}" />
		   </ruleList>
		 </showInfo>
		 <showInfo text="Sorry, no update is available...">
		   <ruleList>
		       <compareText text="${program_exit_code}" value="0" logic="does_not_equal" />
		   </ruleList>
		 </showInfo>
	      </actionList>
	      <ruleList>
		 <compareText text="${shouldCheckForUpdates}" value="yes" logic="equals" />
	      </ruleList>
	   </actionGroup>
	</initializationActionList>
	...
    </project>
Download unattended mode
autoupdate-linux.run --mode unattended --unattendedmodebehavior downloadThe default value for unattendedmodebehavior is check, which causes AutoUpdate tool to only check for updates.
If instead of only checking for updates, you want to download and install the update, the unattendedmodebehavior has to be set to download.
As mentioned, a 0 return code means "An update is available" and a non-zero return code means "No update available" but in some scenarios you need more information. To provide this information, AutoUpdate uses the return codes summarized below:
-
0: Successfully downloaded and executed the installer. -
1: No updates available -
2: Error connecting to remote server or invalid XML file -
3: An error occurred downloading the file -
4: An error occurred executing the downloaded update or evaluating its<postUpdateDownloadActionList> -
5: Update check disabled throughcheck_for_updatessetting
Return codes 0, 1, 2 and 5 are common for both modes while 3-4 are exclusive to download mode.
When launching AutoUpdate from a Windows cmd, as it is compiled as a GUI application, it will launch it in background, reporting 0 as the exit code if the file can be executed. To force the cmd to wait for the process to finalize and retrieve the correct code returned by AutoUpdate it should be launched as:
cmd /W /C autoupdate-windows.exe --mode unattendedThis is not necessary if the AutoUpdate is launched from a VMware InstallBuilder installer using an action.
If no errors occur in the process, this will download and install the update. However, if the update is a big file you may want to provide some feedback to the user. To achieve it you can add --unattendedmodeui minimal or --unattendedmodeui minimalWithDialogs to the command line options. This will display a download progress bar as displayed in the image:
autoupdate-linux.run --mode unattended --unattendedmodebehavior download --unattendedmodeui minimalWithDialogs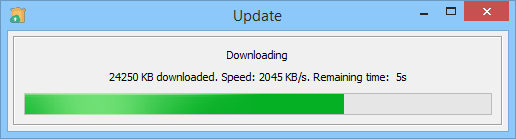
Sequential updates
The easiest way to create update installers is to include some additional code in your latest installer to handle outdated installations. However, using this update method implies that the user has to download a full installer even if the update is minimal, like updated documentation. In these cases, it may be desirable to deliver small delta installers instead, including just the new files and logic to install and configure them.
Currently, the AutoUpdate tool just allows defining one update - the latest one released for a product instead of allowing multiple delta updates and dependencies between them. However, this does not mean you cannot use AutoUpdate to develop these kind of updates. This section details how to achieve it with a step-by-step example.
To implement the multiupdate feature, you just need a regular InstallBuilder installer that will make use of a bundled AutoUpdate. The workflow at runtime would be:
-
Unpack the AutoUpdate and write an update.ini file, with an url containing the
<versionId>of the current version, for example: http://192.168.1.182:8080/updates.php?versionId=101 -
Call the AutoUpdate in unattended mode to check and download the update if any
-
Update the update.ini with the updated version id from the update
-
Repeat step 2 with the updated information
-
…
Using a PHP script as the update URL, you allow the server to decide which update.xml file to deliver. For example, if you store your update.xml files in a directory versions in your server, you could use the below code:
<?php

/* Define the higher version released*/
$maxVersion=12;

/* Get the current version sent by the autoupdate */
$version=$_GET['versionId'];

/* Check if the requested version is correct */
if (!isset($_GET["versionId"]) || $_GET["versionId"] > $maxVersion) {
  echo "Incorrect version";
  exit();
} else {
  /* Depending on the current version, we decide which update to deliver */

  /* We provide an update pack for versions in the range 1-3 */
  if ($version < 4 ) {
     $file="update-pack-1.xml";

  /* We provide an update pack for versions in the range 4-7 */
  } elseif ($version < 8 ) {
     $file="update-pack-2.xml";

  /* For versions below the max, we deliver the next one */
  } elseif ($version < $maxVersion) {
     $file="update".($version+1).".xml";

  /* For the latest version, we resend it, it will be discarded by the AutoUpdate */
  } else {
     $file="update".$maxVersion.".xml";
  }

  $data=file_get_contents('./versions/'.$file);
  echo $data;
  exit();
}
?>
The PHP script will return update packs for the older versions and individual updates for the latest ones. This allows controlling the granularity of the updates.
The next step is to include the update code in the XML project:
<project>
   <!-- bundled version -->
   <versionId>100</versionId>
   ...
   <componentList>
      <component>
         <name>autoupdate</name>
         <folderList>
           <folder>
             <name>autoupdate</name>
             <destination>${installdir}/autoupdate</destination>
               <distributionFileList>
                 <distributionFile>
                   <origin>path/to/autoupdate.run</origin>
                 </distributionFile>
               </distributionFileList>
           </folder>
         </folderList>
      </component>
   </componentList>
   ...
   <parameterList>
      <!-- This parameter will be used to enable/disable checking for updates -->
      <booleanParameter name="enableUpdates" ask="0" value="1"/>
   </parameterList>

   <!-- After installing the bundled version, we query our servers for updates -->
   <postInstallationActionList>
     <!-- Write the initial update.ini file -->
     <writeFile>
       <path>${installdir}/autoupdate/update.ini</path>
       <text>[Update]
url = http://www.example.com/versions.php?versionId=${project.versionId}
version_id = ${project.versionId}
update_download_location = ${installdir}/autoupdate/updateInstallers
check_for_updates = 1
</text>
     </writeFile>

     <!-- Keep asking for updates while available -->
     <while>
       <actionList>
         <showProgressDialog>
            <actionList>
              <runProgram progressText="Checking for updates...">
                 <abortOnError>0</abortOnError>
                 <showMessageOnError>0</showMessageOnError>
                 <program>${installdir}/autoupdate/autoupdate.run</program>
                 <programArguments>--mode unattended</programArguments>
              </runProgram>
            </actionList>
         </showProgressDialog>
         <!-- Break the loop if there is no update available (exit code > 0) -->
         <break progressText="No Update Available">
           <ruleList>
             <compareValues>
               <value1>${program_exit_code}</value1>
               <logic>greater</logic>
               <value2>0</value2>
             </compareValues>
           </ruleList>
         </break>
         <showProgressDialog>
           <actionList>
             <runProgram progressText="Downloading the update...">
               <program>${installdir}/autoupdate/autoupdate.run</program>
               <programArguments>--mode unattended --unattendedmodebehavior download</programArguments>
               </runProgram>
             </actionList>
         </showProgressDialog>
       </actionList>
       <conditionRuleList>
         <isTrue value="${parameter(enableUpdates).value}"/>
       </conditionRuleList>
     </while>
   </postInstallationActionList>
</project>
At this point you have a project that unpacks AutoUpdate and uses it to check for updates while displaying a progress dialog. If your updates follow the same structure, the next installed version will update the update.ini file and, if ${parameter(enableUpdates).value} is enabled, it will check for updates again. As this is not the desired behavior, the AutoUpdate project will be configured to disable it:
<autoUpdateProject>
   ...
   <postUpdateDownloadActionList>
     <!-- Launch the update specifying the ${installdir} and disabling checking for updates -->
     <runProgram>
         <program>${downloadedFilePath}</program>
         <programArguments>--prefix "${installer_directory}/../" --enableUpdates 0 --mode unattended --unattendedmodeui minimalWithDialogs</programArguments>
     </runProgram>
   </postUpdateDownloadActionList>
</autoUpdateProject>
The above code installs the download update in the same installation directory using the ${installer_directory} built-in variable, containing the AutoUpdate parent directory.